|
|
Post by dieselweasel on Feb 14, 2011 20:00:15 GMT -5
i've snared a couple but never caught one in a trap. i was thinking of buying mb550's or is there something better.
|
|
|
|
Post by songdog on Feb 14, 2011 20:28:38 GMT -5
MB-550's are as good as it gets for yotes in my opinion.
|
|
|
|
Post by bigtwinhd on Feb 14, 2011 22:03:29 GMT -5
I haven't used the MB's, and only held one ever, but I have heard good things about them.
|
|
|
|
Post by cdr on Feb 14, 2011 22:23:26 GMT -5
You will get as many different replies to this question as there are different people on this forum....lol
|
|
|
|
Post by furfishgame on Feb 14, 2011 23:05:01 GMT -5
I don't know nutin bout MB's but I know a NO 3 sleepy creek (210.00 a doz for regular jaws) are super strong and tough, come base plated with 2 swivles and the dogs require almost no filing
|
|
|
|
Post by dieselweasel on Feb 15, 2011 6:27:09 GMT -5
Thanks guy!
|
|
Forrest
Administrator
Trapper
Posts: 1,000,271
|
Post by Forrest on Feb 15, 2011 11:43:54 GMT -5
550's are great coyote traps I use them a lot on my canine line...
|
|
|
|
Post by songdog on Feb 15, 2011 15:55:12 GMT -5
I also use the sleepy creek 1.75's and they are good traps also. Really strong springs.
|
|
|
|
Post by jtdaniel on Feb 15, 2011 16:07:07 GMT -5
MB 550's are good trap the sleepy creek 1.75 are alright but the dog is junk as is the chain. If you are looking for straight out of the box performance MB's are good choice.
|
|
|
|
Post by ScottRainbolt on Feb 15, 2011 16:22:23 GMT -5
if i was going to by mbs for yotes it would be the 650s go big or go home lol
|
|
|
|
Post by dieselweasel on Feb 15, 2011 17:03:58 GMT -5
We got some fox around though. Won't that crush their leg?
|
|
|
|
Post by jtdaniel on Feb 15, 2011 18:21:40 GMT -5
We got some fox around though. Won't that crush their leg? First off traps don't crush legs and secondly if they are laminated or thick cast jaws they would be fine for an occasional fox. |
|
|
|
Post by cdr on Feb 15, 2011 18:47:33 GMT -5
We got some fox around though. Won't that crush their leg? First off traps don't crush legs and secondly if they are laminated or thick cast jaws they would be fine for an occasional fox. very well put.... |
|
|
|
Post by ScottRainbolt on Feb 16, 2011 6:11:19 GMT -5
i catch fox in my 650s and there ok
|
|
|
|
Post by Furtrader on Feb 16, 2011 15:42:12 GMT -5
you can catch yotes in the mb450 also
|
|
|
|
Post by dieselweasel on Feb 16, 2011 17:46:53 GMT -5
I think 650s are illegal here. Think i'll go with 550s. What about sets. i've made walkthroughs, trench, and dirthole. Any info on how to make them properly. never caught any in them, but we didnt start until two days after xmas with terrible weather.
|
|
|
|
Post by dieselweasel on Feb 18, 2011 6:47:38 GMT -5
I checked the rags. And 650s are legal here so I might decide to get them.
|
|
|
|
Post by happersilderness on Feb 18, 2011 19:13:58 GMT -5
I've never used MB's but I've heard wonderful things about them. I just use #2 bridger coils, and a #4 victor double longspring since thats all I have I hope to try the MB's in the future.
|
|
|
|
Post by dieselweasel on Feb 26, 2011 10:38:45 GMT -5
Ok, enough about the traps themselves. What about the sets, lures, trap placement, snares, and baits?
|
|
|
|
Post by bill1958 on Feb 26, 2011 11:52:12 GMT -5
Here is were i have gone to the top of a ridge were i have seen the yotes digging and scratching around more moles and mice. I dug out a step down hole set up. First i dug a small pit. Then i placed the dirt hole about 2 inches below the dirt line. In the first pic i show were i have the Montana No. 3 dog less with off set placed in the little pit. I have packed the jaws in dirt and have placed a grass wad under pan. 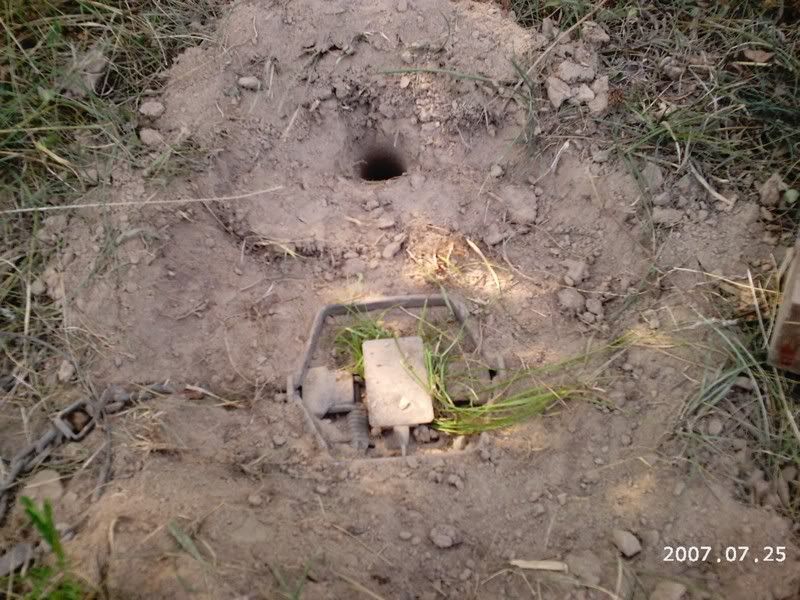 Now in the second pic i have used the extra dirt from the hole and pit to sift the trap in. Now when i do this i want the trap pan to be the lowest spot at the set. This should be were he will step when he starts to dig the hole. Notice the dirt is smooth and no debrie to get caught in jaws. 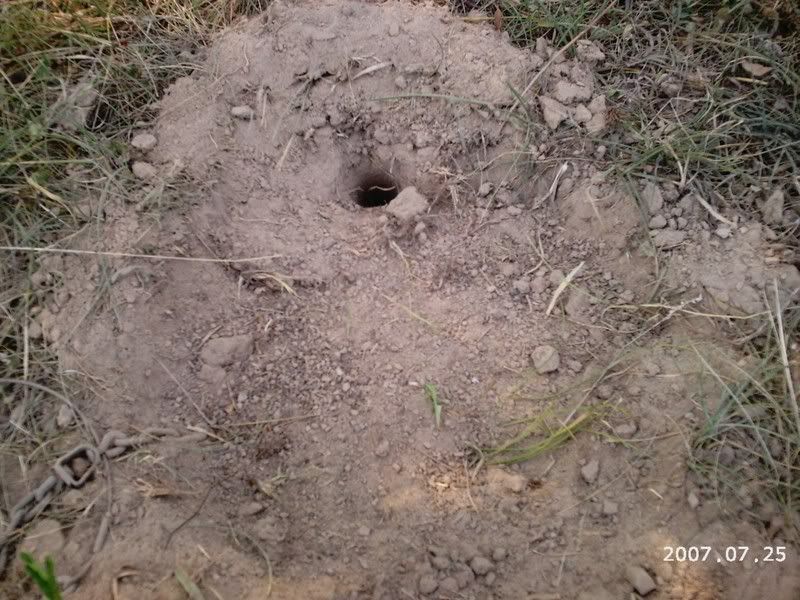 Now the 3rd pic shows were i have taken half the egg and have seated it at the bottom of hole and the rest i have set around the front entrance to the hole. Now this pit set up imitates a turtle nest that has been dug by another animal. And these egg shells not only add the smell factor but also some sight variables into the equation. Notice how the egg in hole and shells scattered around hole makes this look inviting. The cow jaw bone adds even more visual aid to set 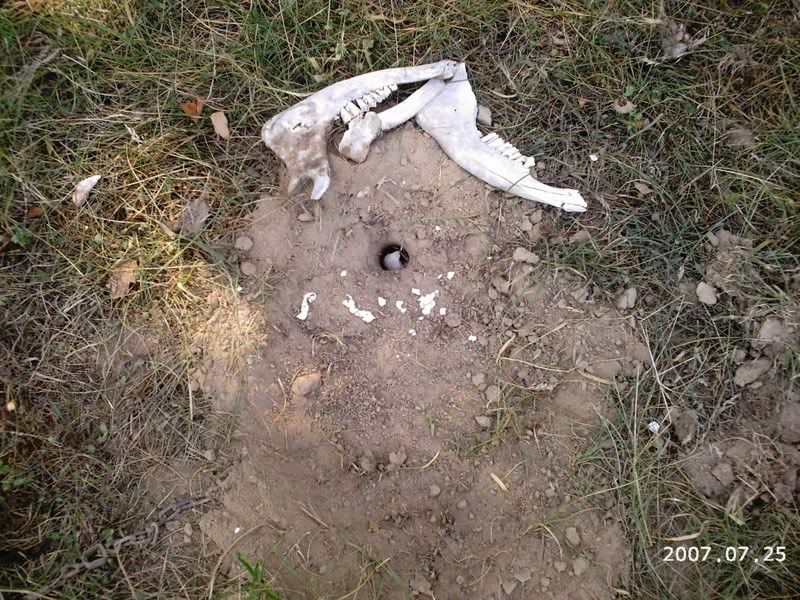 Well it just didn't catch my eye like i wanted so i added some more bones to backing. This 4th pic show the final set. This is what i want him to see on his approach. 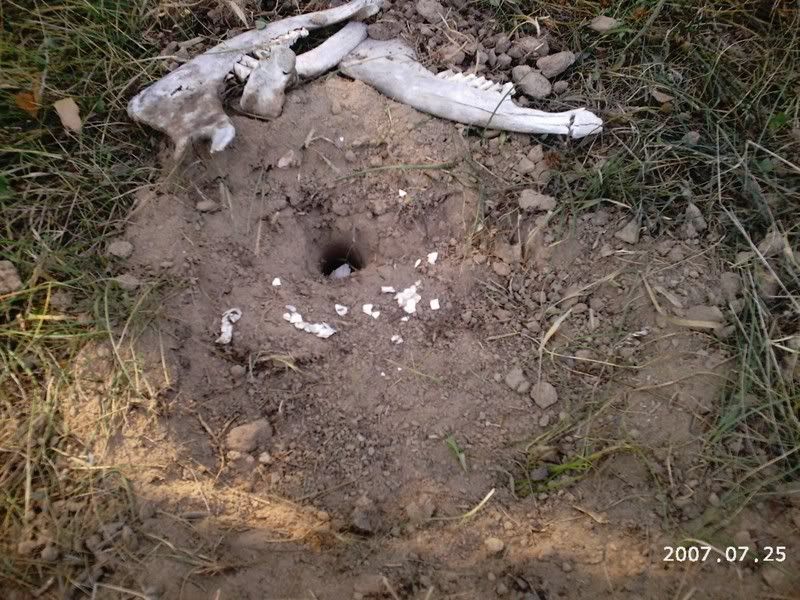 The final pic give a view from a distance from set see how the white bones stands out against the grass and timber. Now this alone would work on the curiosity factor but with the shells and extra bones he will swear there is food buried there. This set up is also great on fox and cats if set on sign. 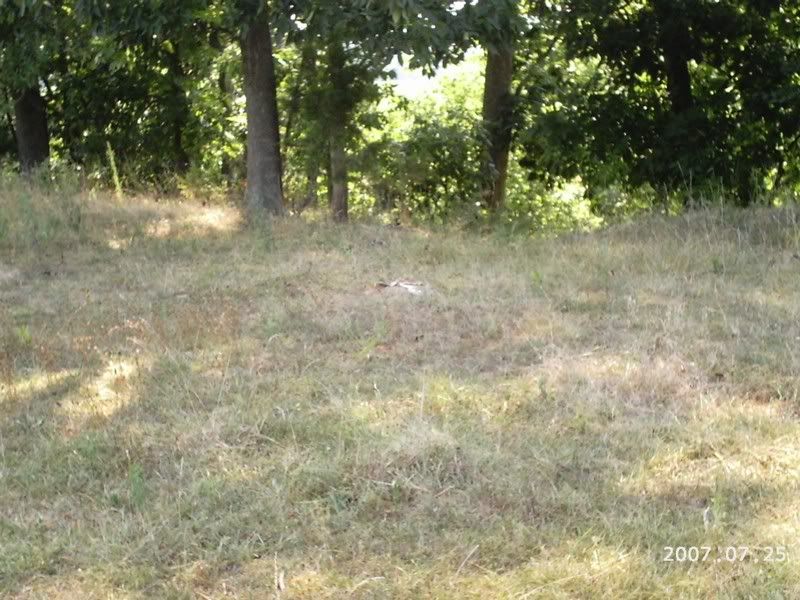 This should give you some idea how i use the egg shells for eye appeal and the smell of eggs. I hope this adds to your set ups try this and i am sure you wont be disappointed. Thanks for looking |
|
|
|
Post by bill1958 on Feb 26, 2011 11:53:54 GMT -5
The first pic is a location pic it show were the timber edge and pasture edge comes together. The coyotes will run these edges looking for food and as travel routes from dens to feeding areas. But the true Key to trapping coyotes is location if you can find where they have been they will be back. 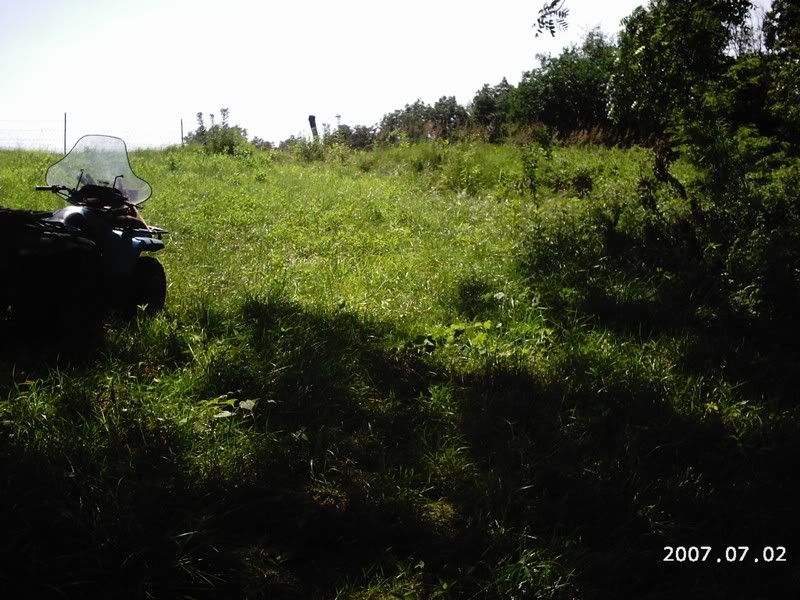 The next pic shows the area i chose to put the set. And the tools i will be using to make the set. 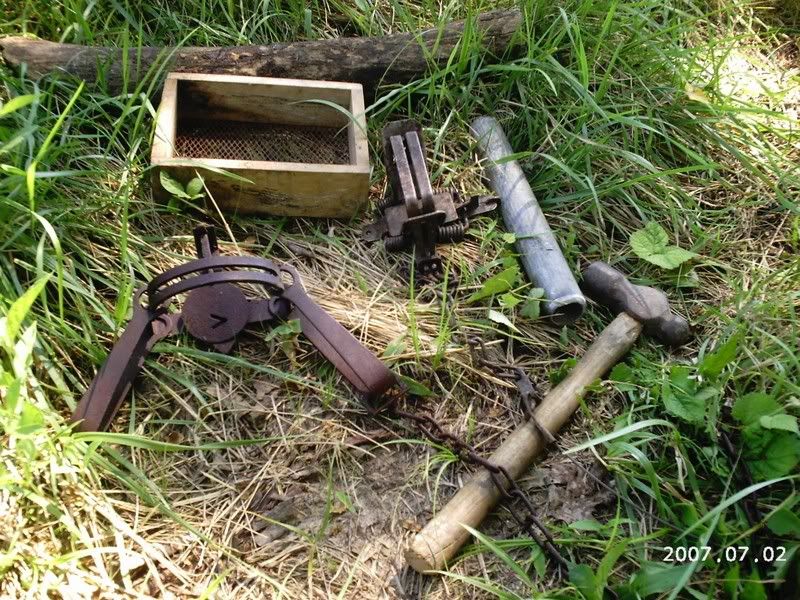 The next pic shows the placement of the hole to be made. I will be using a 2 inch piece of pipe thats 10 inches long. I will drive the pipe into the ground with the hammer and then tap the sides of pipe to release it from the hole. Then remove the pipe tap out the dirt from pipe. This dirt is used to add to the set. 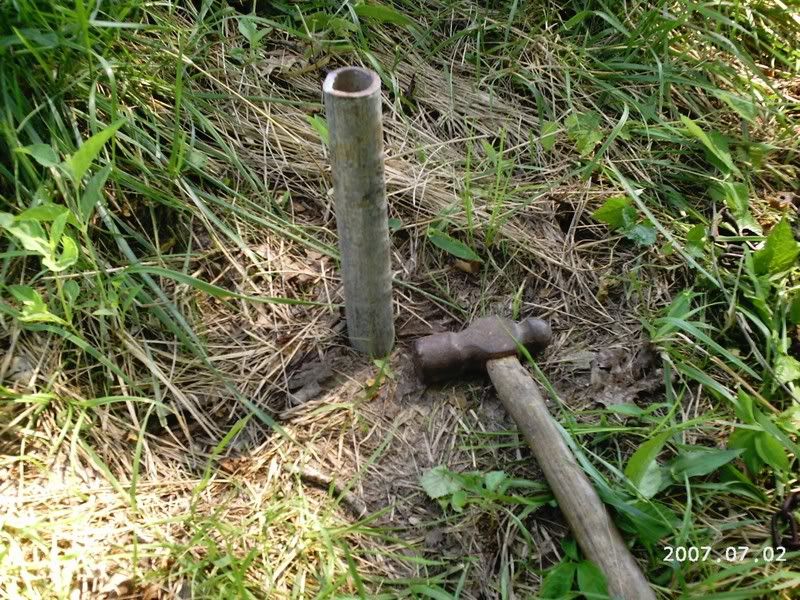  The next pic's show the trap bed has been made and you have 2 options for proper trap placement and the type of traps to be used. I have chosen the #3 Montana dog less in the first pic and in the other pic i will finish the set with the Victor #3 offset jaws.   The next pic shows That the victor#3 has been placed in the bed and made to set firmly in place. After that the dirt and packing material is laid. I place dry grass under the pan as this keeps the dirt from packing under pan thus keeping it from firing. This is the final set up prior to sifting the set. 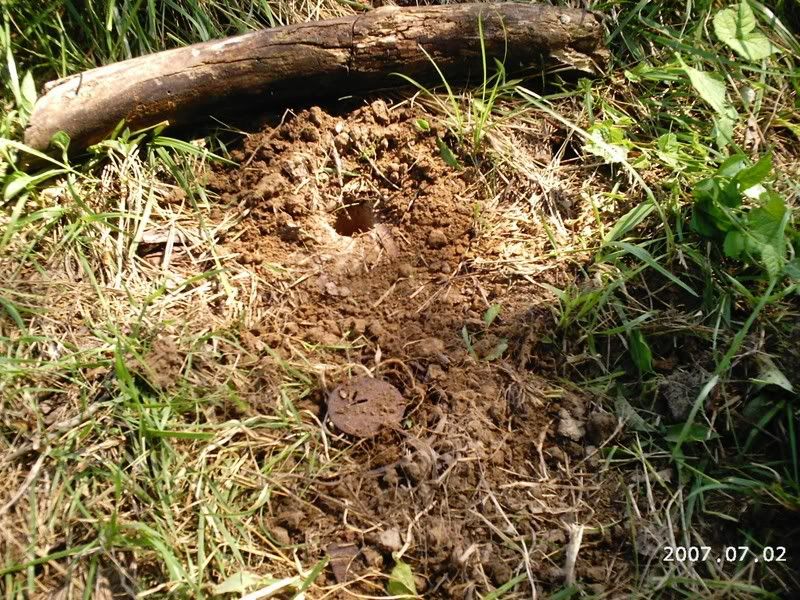 The next pic shows my sifter filled with the dirt from the trap bedding. This dirt will be sifted on to the trap to totally cover it. Notice the change in appearance the set takes on when the dirt is sifted on. 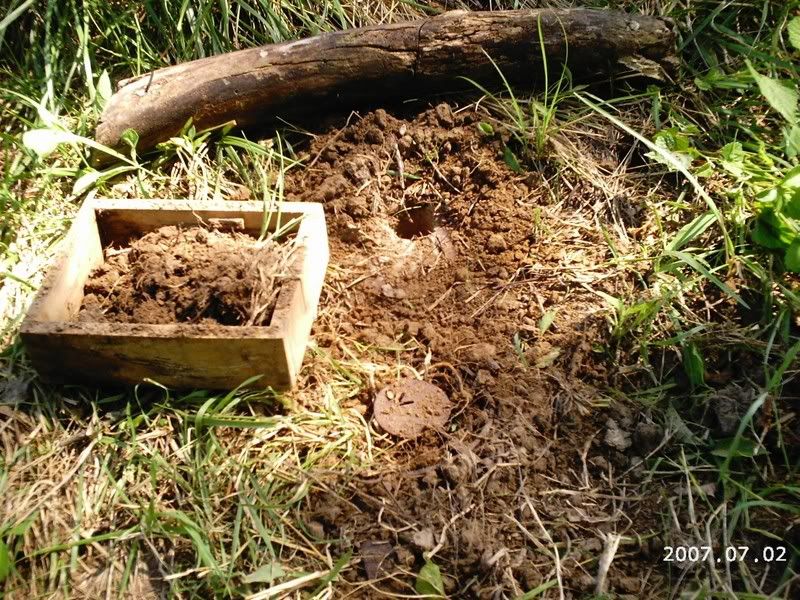 The next pic shows the backing log added and some dead branches with the dead leaves. This is in contrast to all the green material surrounding the set. Thus eye appeal. 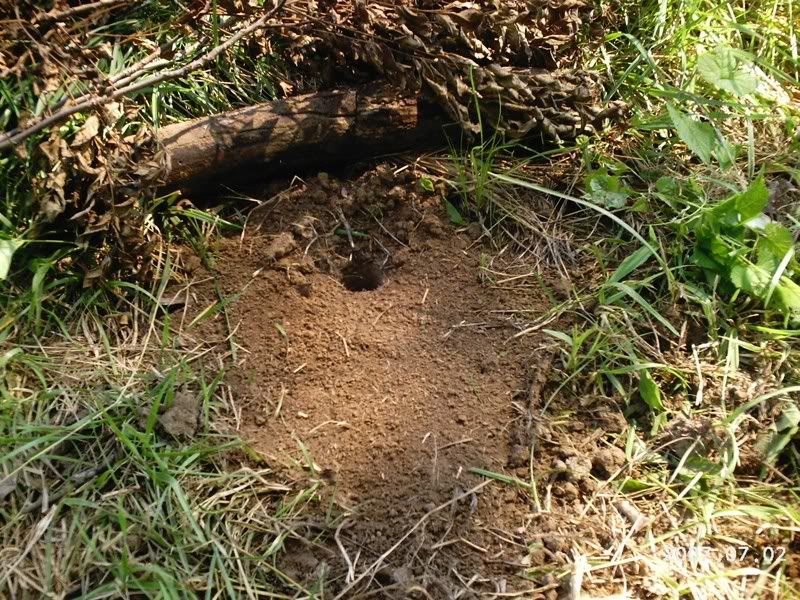 Now the next pic shows the finished set. Now this is the time for you to decide what bait lure or blocking you want to add to the set. Backing away from the set and look at the situation. This will give you and idea from where your target will approach from. I like to put the bait down hole and add gland lure about 10 ft away on both side of the set. I like to plug the hole with a ball of dry grass. this will make them work for the bait. Thus keeping them working the set and more of a chance he will find the pan. This set up was made more for coyotes than fox. Just move the trap closer to the hole for fox. I hope this will give the guys and Girls a way to start dirt hole trapping. There are many variations of this set so be creative. |
|
|
|
Post by bill1958 on Feb 26, 2011 11:55:36 GMT -5
The first picture shows the tools i used to make this set. A good claw hammer will do the trick for a shovel in this set up. Then we have our dirt sifter. Next we have the anchor setter for our conduit anchor. Now before you start to make this set take your anchor setter and run it in the spot where you will be placing the set. This will save you some time and aggravation. Just think you have the set done and are ready to set the trap and find out there is no way your trap anchor is going to work in this location. So always do this step first. 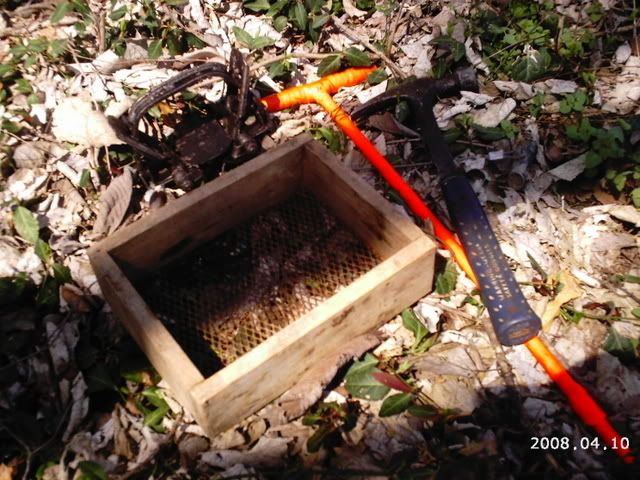 The next step is to clear the spot of debrie and other obstacles where we plan to use this set. Once we have the anchor hole put in. We now know its safe to proceed to build this set up. The next pic shows where we have the spot cleared and ready for construction. 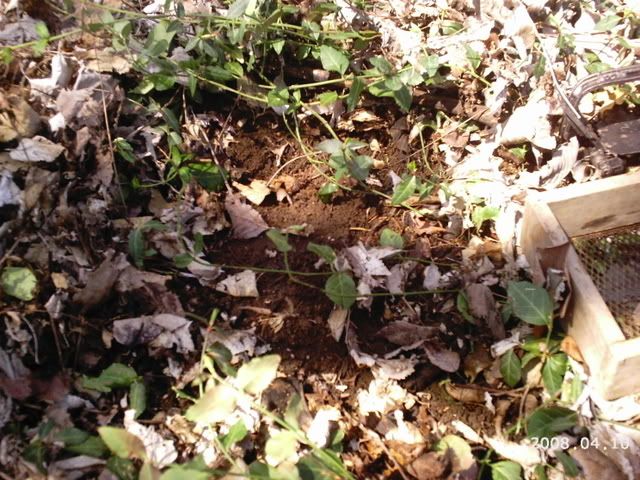 The next picture shows where we have cleared 2 levels of dirt in this hole. The first level is about 2 to 3 inches down. This is the level where the trap will be placed. The next level is where we will be putting the dirt hole. As you can see in the picture the lower hole has the smaller dirt hole in it. This dirt hole in 5 to 6 inches below the grass or dirt top. 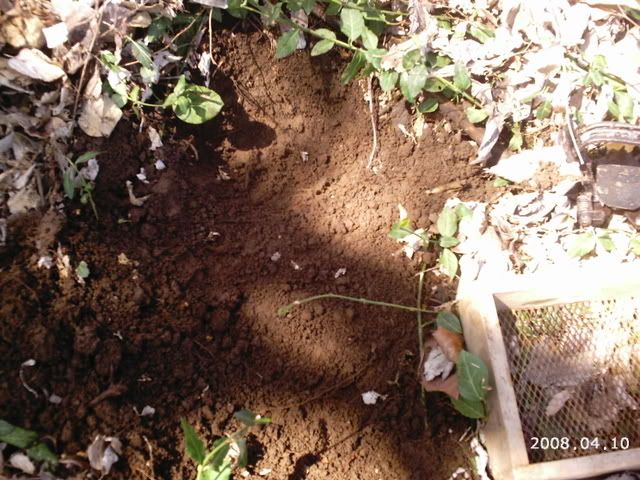 The next picture shows where we have the trap bedded in the first level. The dirt hole is below the trap. This is where the animal will step down into the first level to reach the hole for a try at the bait or lure in the hole. 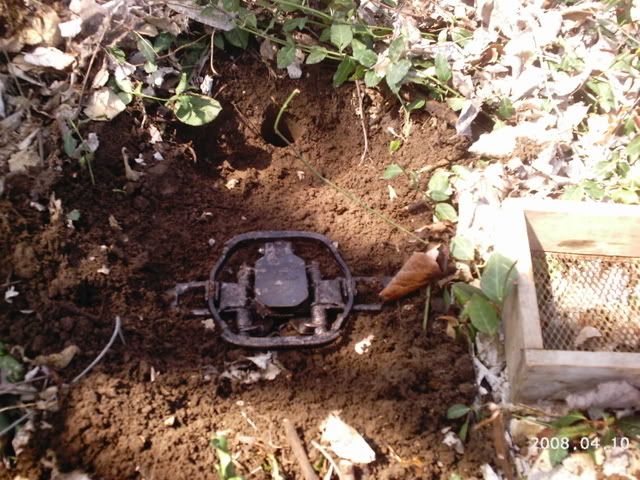 The next picture shows the trap with the dirt packed in around the jaws and it has been bedded solid and is awaiting the next step. 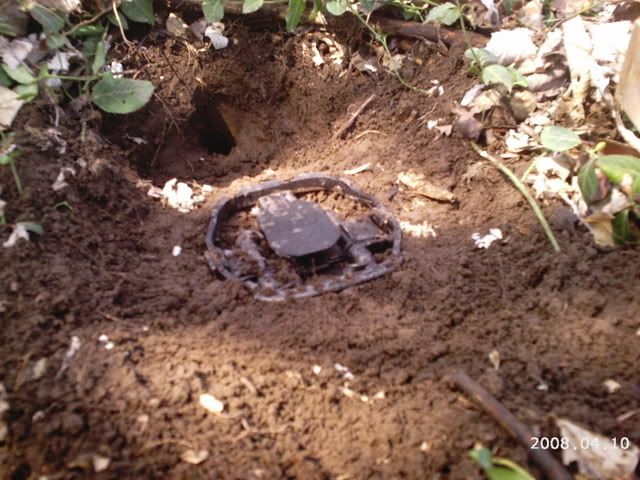 Now the next picture will show where i have taken some dry leaves and crushed them to make a trap covering. This will keep mud and other debrie from getting between the pan and frame of trap. If we didn't do this step the trap would get the dirt and debrie under pan and not fire. You may also use wax paper or any other pan covering you would like. But for this set in good conditions will work great. 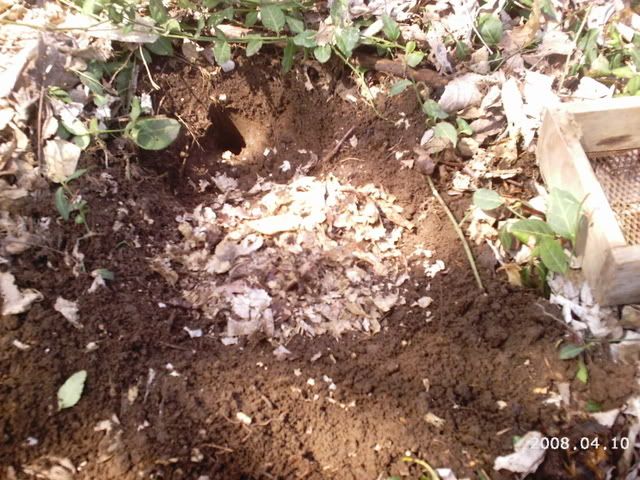 The next picture shows where i have taken the sifter and sifted a fine layer of dirt over the crushed leaves. This adds to the illusion of the step down. 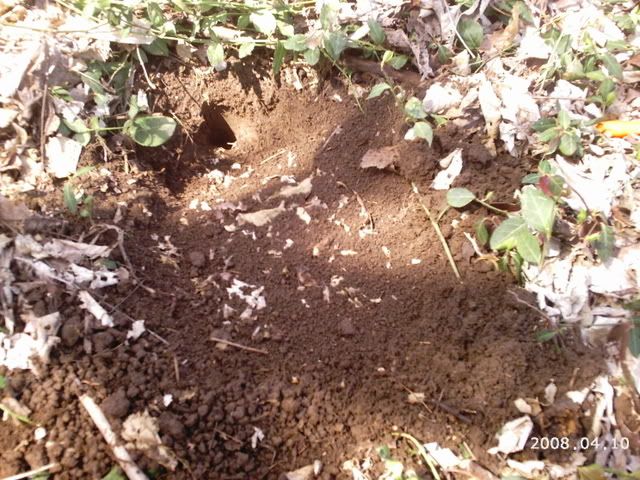 The last and final picture we try and blend the lip of the main hole. Now you have a completed step down dirt hole set. I hope you find a great location in which to make this set as it is a good bet that the animal will be stepping down into the hole. And right into your trap. The step down is a natural backing and more or less makes them work the set from the direction of the trap. Good luck with it. |
|
|
|
Post by bill1958 on Feb 26, 2011 11:57:10 GMT -5
Flat sets are very versatile you can really use these with just about any object that stands out in the animals territory. They will investigate any thing new and the flat set can be used to capitalize on these situations. Urine post sets are made much the same way. This can also be used for the T bone set up as well. The first pic is a location pic were the yotes and fox will use these as travel corridors to and from bedding areas and feeding routes to look for food. 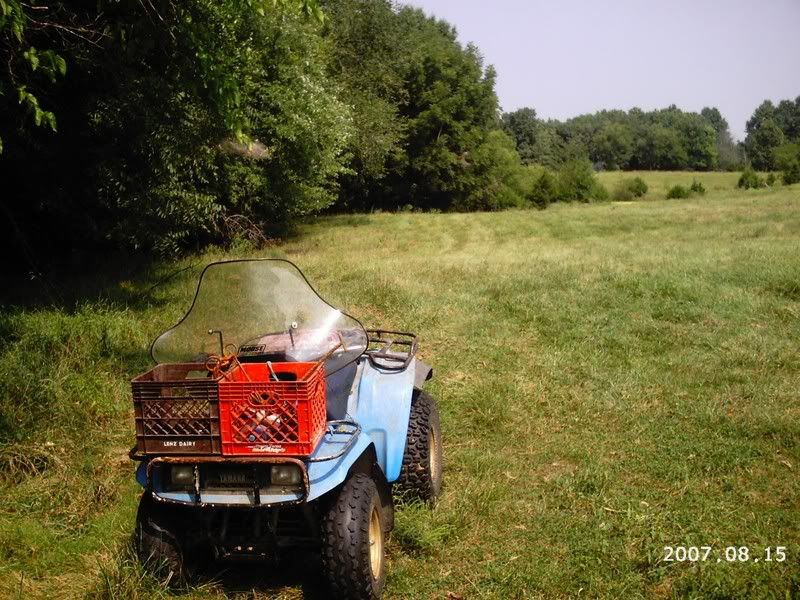 The next pic shows the tools needed for the making of this set up. A different trap can be used. I am using a north woods 1.5 for this set up. There are more fox than yotes running this area. 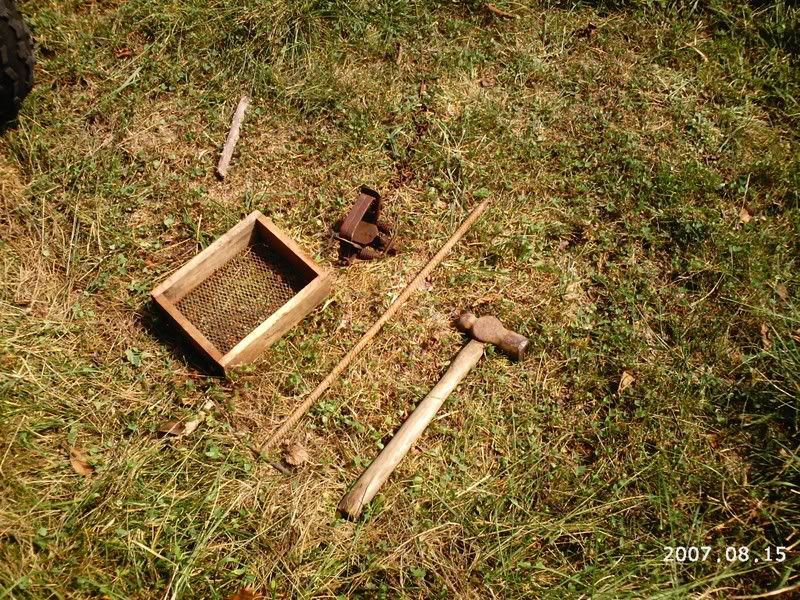 The Next pic shows the cut out bed for the trap. The trap isn't set yet as to ensure this is a good fit for trap. 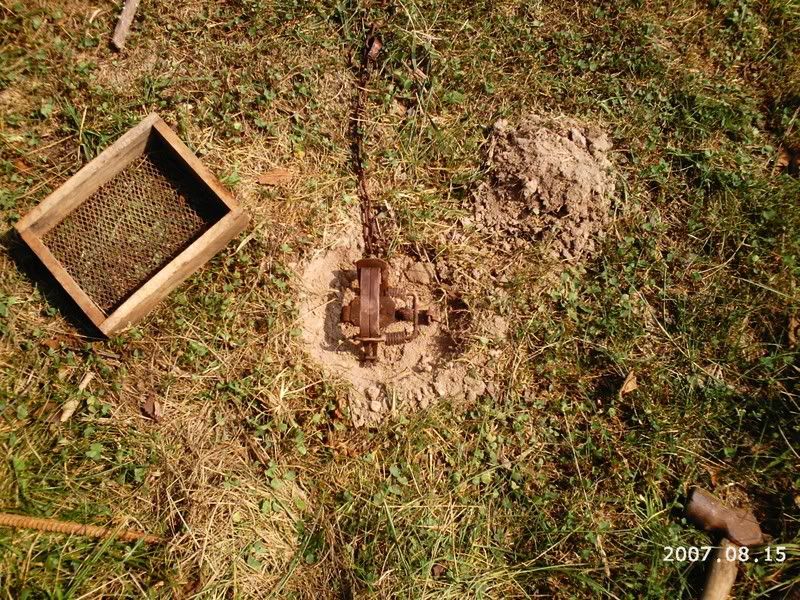 The next pic shows the set trap placed in the trap bed and positioned as you see fit. 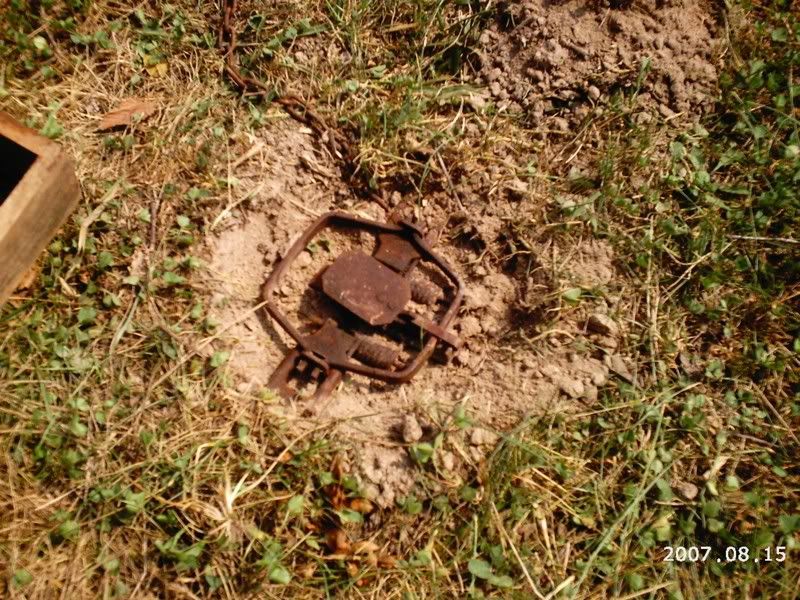 This pic shows were the dirt has been packed around the jaws for a sure tight fit to the bed. You don't want to have a trap shifting when the animal steps on a jaw or lever. Also if you look close you can see the grass wad under the trap pan. This keeps the dirt from compacting under the pan preventing the trap from firing. Also this helps keep the mud after a good rain from putting the set out of commission. 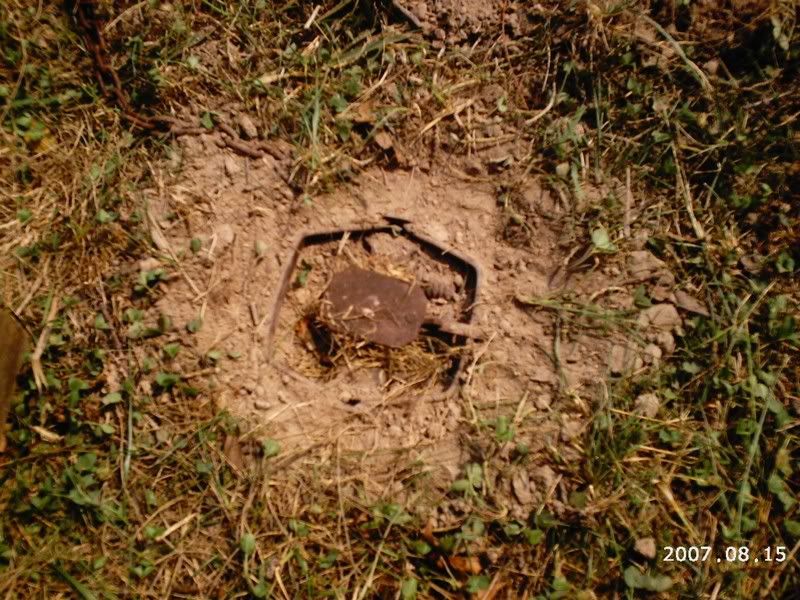 The next set shows where the trap has been sifted and blended in with the surrounding cover. And a piece of backing has been added for the sight appeal this is usually what attracts them it is something out of place. This can also be used for a scent post by adding a good lure to the backing. 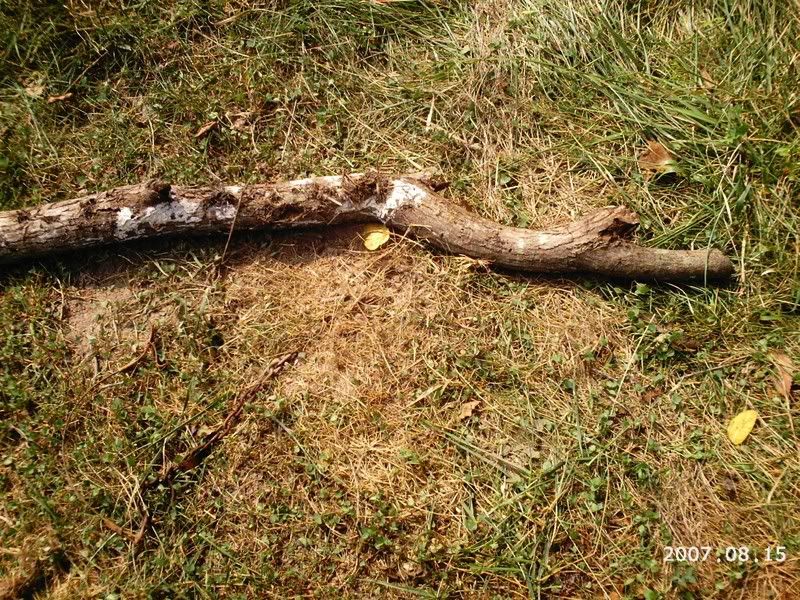 Now the last pic shows the set from a distance. This is the view of what the animals will see. The log is a object that is out of place and will get there attention. 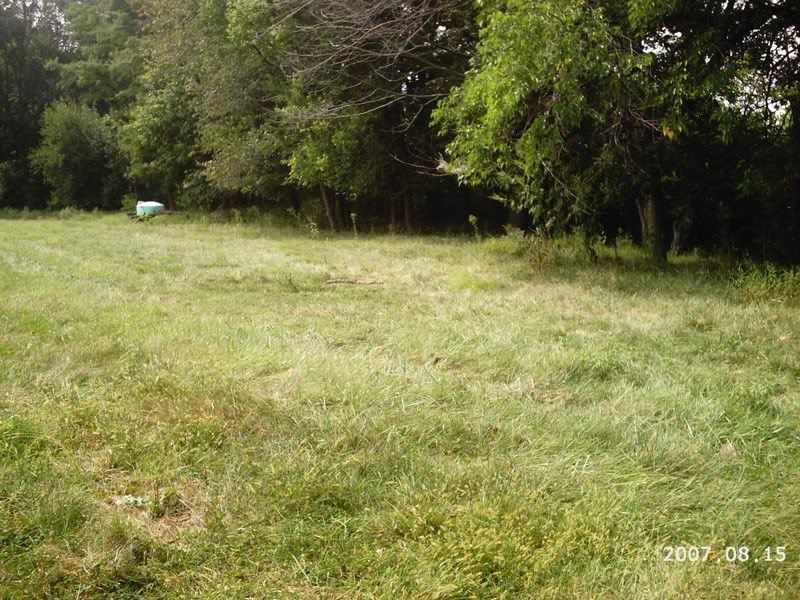 I hope this is a good explanation and helps you guys. |
|
|
|
Post by alwright on Feb 26, 2011 12:53:29 GMT -5
That was great Bill, lotsa great info there thanks for posting.
|
|
|
|
Post by ewoktrapper on Feb 26, 2011 13:05:41 GMT -5
Great posts bill....That will help a few new guys out !!!!!
|
|
|
|
Post by dieselweasel on Feb 26, 2011 16:33:46 GMT -5
I'll have to try the eggs at the dirthole. Thanks for the tips Bill!
|
|
|
|
Post by minifoxer on Mar 9, 2011 18:25:21 GMT -5
great post bill !!! thanks!
|
|
|
|
Post by dieselweasel on Mar 17, 2011 17:16:50 GMT -5
What about snaring. Any tips or unquie methods on it? If so lets hear we all could use a hand.
|
|
|
|
Post by milkie62 on Mar 22, 2011 22:21:46 GMT -5
This is my first real year for canines.Have no problems with fisher in 1.5 duke coils.I have bought 5 MB 550 offset.Caught coyote,fox and fisher in them and have not missed an animal this year.Some of the other traps are within a couple of bucks of the MB's but then you have to modify them to equal the MB's. IMO the MB's are top shelf and I am kinda cheap when it comes to traps. Any new canine traps will be MB 450's and 550's. Will still use Duke #4 coils for beaver since they work well for me.
|
|